Monday, May 23, 2016
Monday, May 2, 2016
Book Study, Part 1- The Smartest Kids in the World
I like
this book so far, I'm not very much of a reader, but it is pretty interesting
so far. I think reading this book is almost a good second hand experience.
Especially, reading about how other countries' education systems work. I
believe that I relate the most to Eric, who traveled to South Korea. Eric also found that math
instruction in South Korea was very cool and much more interesting than he
found in his math classes back home. And he also found the grit of the Korean
kids to be truly impressive. I think math is so interesting and the way Eric thought it was so impressive and interesting about how Koreans learned and were taught is exactly what I would think about it. Especially seeing how quickly they maintain the knowledge of everything that they are taught. In my opinion, each of the schools in the three countries are very interesting in the way that they teach the students and how the students learn. It is pretty cool how each of them are different in their own way. I think South Korea's education system would be best for the U.S. because I think it would make our education levels higher and help students with testing and learning in general.

Monday, April 18, 2016
Class Tech Tools
This is the LiveBinder that contains all of the resources in class that we learned about that could be useful in the classroom.
Tuesday, April 12, 2016
My web tool/app: Symbaloo
SymbalooEDU is a Personal Learning Environment (PLE) tool that allows you to organize websites and resources
in one place for you and your students. You can create webmixes, which are pages you can create to organize
your web content and resources. Each resource is created in the form of a tile, making Symbaloo quick and easy
to use. Follow this step-by-step guide to create your own webmix!
- Go to http://edu.symbaloo.com/. Click on Sign Up Free, create your account, then click on Get started with your webmix. According to Symbaloo's Terms and Conditions, if you are below the age of 16, then parent permission is required.
-
Symbaloo automatically adds webmixes that they think will be helpful to you. They are easy to delete if you don’t want them, but check out the resources they offer first (some are pretty good).
- To delete a webmix that you don’t want, click on the Delete webmix tab and a dialog box will pop up that asks you if you are sure you want to delete it. Some Symbaloo pages will have a Remove tab – follow the same steps.
- Symbaloo gives you the option of adding shared webmixes to your page. To do this, click on Add a webmix and do a search (ex. Teacher resources, Web 2.0, Reading, etc.).
- Select a webmix from the list. If you find one that you like and will reference often, click on Add this page and it will appear on your Symbaloo page as a new tab.
- To create a new blank webmix, click on the blue plus sign to the right of the webmix tabs and a blank webmix titled new Desktop! will appear.
- Webmixes are meant to be personalized. Start by renaming your webmix. To do this, click on the Edit webmix button, click on the Rename webmix button, and rename it.
- Another way you can personalize your webmix is to change the wallpaper. Click on Change wallpaper and either choose from the Symbaloo presets or upload your own photo or background.
- Another way you can edit your webmix is to add extra space for tiles. To do this, click on the arrows that are to the left, right, and bottom of the tiles to expand one row over or down. This is helpful as the amount of tiles you create expands.
- When you are finished editing your webmix, click on Done editing.
- Now it’s time to add your tiles. Tiles can be created two ways. The first way (a) is if you are adding a public tile (a tile that has already been created and shared on Symbaloo). The other way (b) you can create a tile is if you want to add a tile that hasn’t been created (or shared) yet.
- To add a tile to your webmix, click on one of the blank tiles and type in the title of a website that you would want to share with your students (wikispaces, youtube, etc.). As you type, public tiles will appear. Click on the correct tile and it will appear in your webmix. If no tiles exist for the website you want to link to, click on click here to create your own tile. A dialog box will pop up. Type or paste in the URL, give it a name, choose an icon, and click on Add tile to webmix. Then, click on the tile to add it to your webmix.
- Tiles can be personalized as well. To do this, right click on a tile and select Edit.
- You can change several things to meet your needs. Display the name on the tile, change the picture on the tile, and change the tile color.
- You can also copy and move tiles from one webmix to another. To do this, right click on the tile you want to copy or move > select Copy/Move and a dialog box will come up. Select the webmix you want to copy or move the tile to and specify whether you want to permanently move the tile or if you want to make a copy of it then select Move tile.
- Tiles don’t just have to be links to websites, they can be links to embedded files as well (ex. YouTube). To do this, find a YouTube video, click Share (right under the video) and copy the embed code.
- Then, in Symbaloo, click on an empty tile, click on click here to create your own tile, select Embedded from the drop down menu, paste the embed code into the box where you put the web address, title it, choose your icon, tile color, etc. and add the tile to your webmix. When you or anyone else clicks on the tile, it will open up the video in Symbaloo!
- One of the best things about Symbaloo is that you can share your webmixes with others. To do this, click on Share, then you can either share it with the public, or more importantly with friends, colleagues, and students.
- When you choose to share it with friends, Symbaloo gives you two options. Either copy the link and email it to whoever you want, or you can post it on your Toolbox Pro website using the embed code.
- To embed your Symbaloo in your TBPro website, copy the embed code it gives you, then go into your TBPro account, open up the webpage you want to place it on, click on the HTML button, paste the embed code and then you’re done! You just need to resize it by clicking on it and dragging in the corners.
Extra helpful things:
- Here is a video tutorial. There are 2 helpful videos on that website.
- There is also a mobile app so Symbaloo can go where you go.
- My example of Symbaloo
Ways to use Symbaloo in the classroom:
- You can use Symbaloo to share classroom websites with your students and parents. For example, middle school or high school teachers can create a Symbaloo to share information about homework, projects, or information on anything to the students. For parents, teachers can create a Symbaloo to share classroom schedules, activities, calenders, etc. On my Symbaloo I have a link to my field site teacher's website.
- You can customize your lesson plans with Symbaloo. You can make a webmix for every lesson you teach to stay organized and it helps you have a plan. Here is a social studies lesson plan webmix.
- You can use Symbaloo to make digital portfolios for your students. For high schoolers, each tile on your webmix can be a link to your students' portfolios. Click here for an example.
I think Symbaloo could be helpful and productive in any subject. It helps you stay organized and it's all in one place.
Wednesday, March 30, 2016
Perot Museum Field Trip
PEROT MUSEUM FIELD TRIP

This Video features pictures and videos of my field trip with my teaching and education program. It includes photos of my favorite exhibits as well as me interacting with some of the objects in the exhibits. It will also include a few pictures of my class and my chaperoned group. As you will see it was a very fun trip. Enjoy!
Tuesday, February 16, 2016
Creativity Counts!
 I encourage creativity in my kindergarten class room because I love to be creative. When the students are given the instruction to draw a picture about a certain subject they tend to ask me and Ms. Filis what they should write. Instead of really telling them what exactly to draw and write about, I ask them questions that may spark a creative idea for them. I believe that even asking a small question to spark a small idea of being creative definitely helps develop a student's creativity.
Creativity is being able to use your imagination and being able to act outside of the box. Being creative also may mean that you have no restrictions. Creativity matters in education because it sparks an imagination. Having an imagination helps in the future to develop a broad mind, instead of growing up narrow-minded. Some students, when given an assignment, tend to ask their teacher what they should write and how many sentences there has to be or what colors should be used.
I have been in a situation where I felt as if my teacher didn't let me be creative. We were given an essay to write and we were supposed to write a story about anything but she still gave us limitations on what to put in the story and how long/short it had to be. Which made it extremely difficult to write a good story and to use my creativity to make my story a story from my imagination. I've had a teacher that let me be creative, but not as creative as possible. I was still given some limitations.
To fix the problems described by Sir Ken Robinson is to focus on students and how creative they really can be. For example, maybe on the first day of school give an assignment where the objective is to be as creative as possible! I believe that focusing on the students and how their minds work is a definite way to fix those problems.
Monday, February 1, 2016
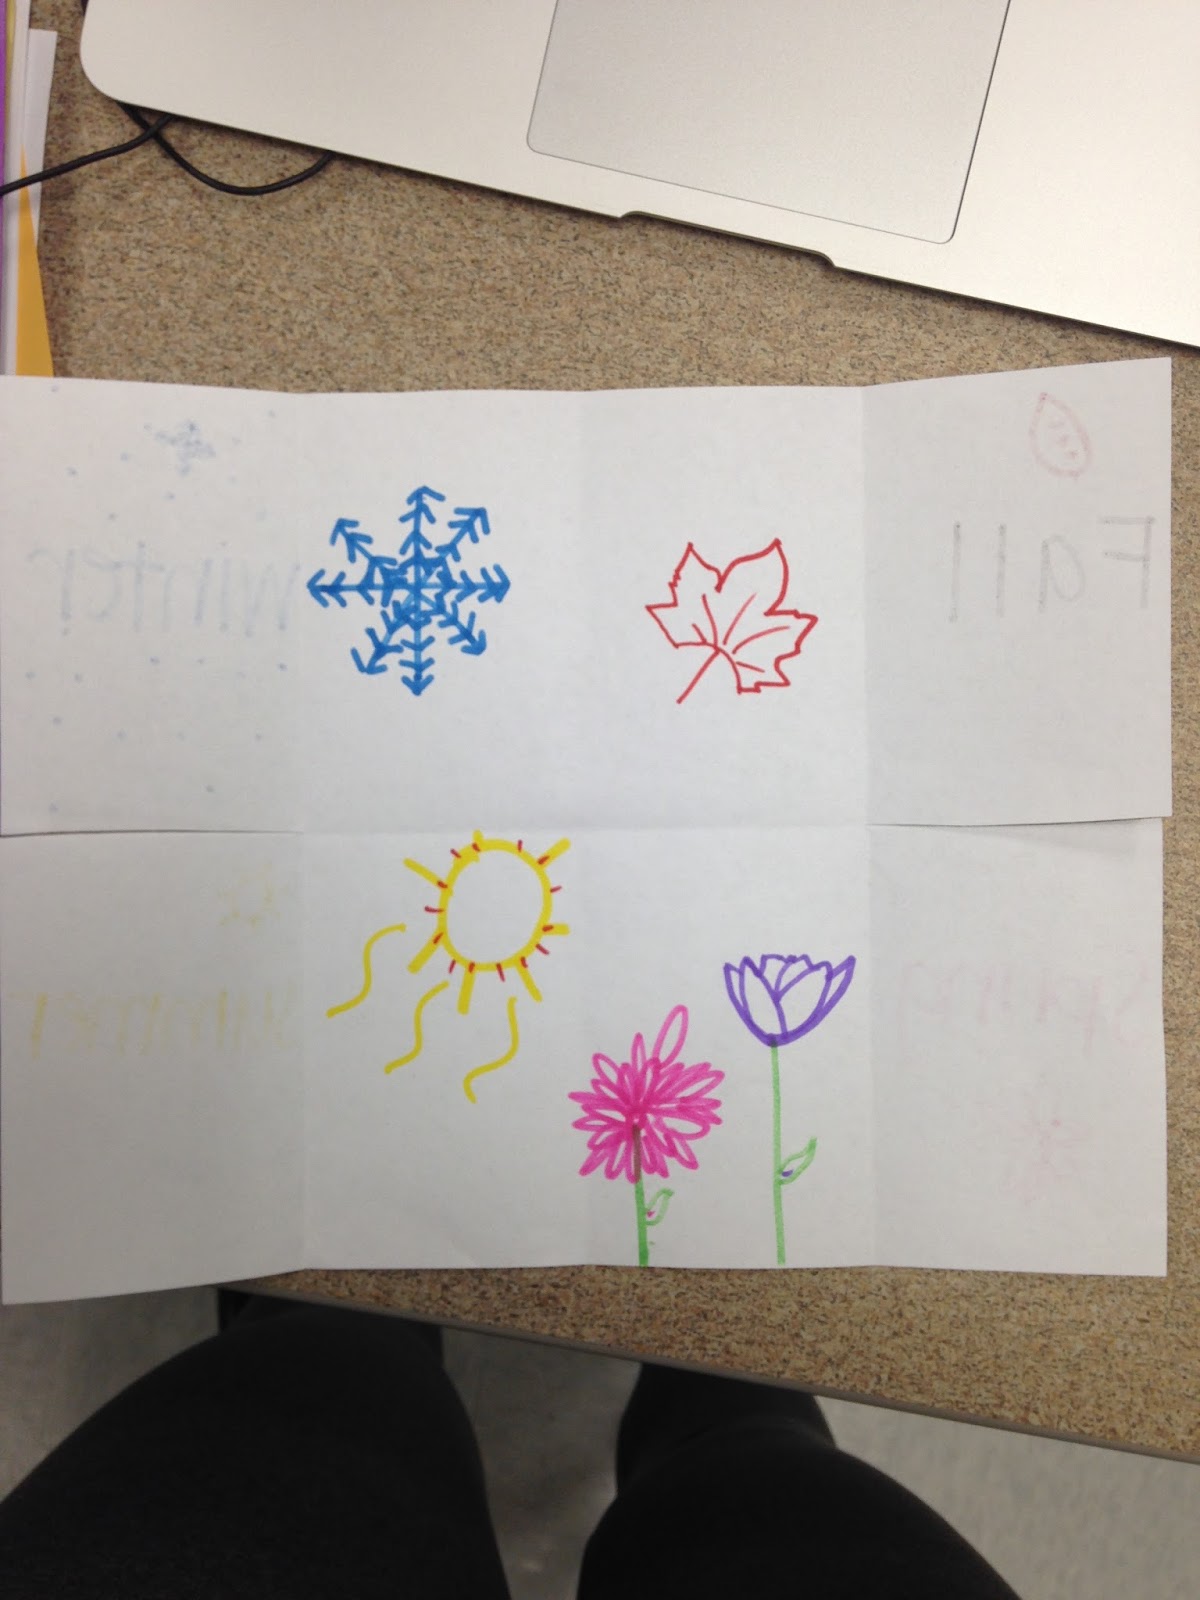
Fold It!
Seasons Foldable
Earth and space. The student knows that there are recognizable patterns in the natural world and
among objects in the sky. The student is expected to:
(A) observe and describe weather changes from day to day and over seasons
Materials Needed:
- Paper
- Colors (markers or crayons)
- season stickers
Steps:
- Take the paper and fold it in half
- Then take each side and fold it until the end of the paper touches the center crease
- Then from there fold it in half (hamburger style)
- Open it up
- Cut where the fold lines are
- You should have flaps
- On the tops (outside) of the flaps write the seasons. One season per flap.
- On the inside of the flaps, draw pictures that best represent the season that is on the outside if that flap
- Use the markers or crayons to color the picture representations
- You can use the season stickers to place on the outside of the flaps to decorate the words of the seasons
The foldable should help the students determine the different seasons and what each season typically looks like. For example, usually snow is a good representation of winter and leaves are a good representation of fall.

Subscribe to:
Posts (Atom)